


Creating a Custom Connector in WS1 Intelligence
What is Workspace ONE Intelligence?
Workspace ONE Intelligence is the mainstream data analytics product within the Workspace ONE product suite. It allows you to tap into a wide array of data sources (from UEM, SDK enabled apps, Access and others) to get unique Insights & Automation capabilities over your End User Computing landscape!
Features
- Unified Visibility: Workspace ONE Intelligence aggregates and correlates device, application and user data together in one place to deliver a complete view of the entire digital workspace environment.
- Digital Employee Experience Management: Track digital workspace KPIs impacting employee experience, proactively identify issues, perform root cause analysis, and quickly remediate across Windows 10, macOS, iOS and Android. Increase employee engagement and productivity
- Rich Visualization: Keep an eye on the data that matters to you most with preset dashboards that can be customized to meet your unique needs. Visualize the evolution of your environment’s security posture, app deployments, device management, app experience and engagement, and patch rollout.
- Automation Engine: Automate processes by defining rules that take actions based on a rich set of parameters. The Workspace ONE Intelligence automation engine integrates with threat feeds, such as CVEs and our Trust Network security partners, to help make data-driven decisions.
- App Analytics: Measure app adoption and engagement across your environment and quickly discover app usage and ROI. Help business owners make data-driven decisions on app deployment and migration.
- Risk Analytics: By aggregating device, app and user behavior data from multiple internal and external sources and leveraging machine learning models, Workspace ONE Intelligence calculates a user risk score and enables conditional access based on device context, login risk and user behavior.
Source: Workspace ONE Intelligence Datasheet
The feature that I’m excited about (and one I’m very interested in) is the automation and integration capabilities that come with WS1 Intelligence! It allows you and your organization to be agile and react to changes within your End User computing landscape by building automation capabilities limited by only your imagination (and of course REST API availability 😄 )!
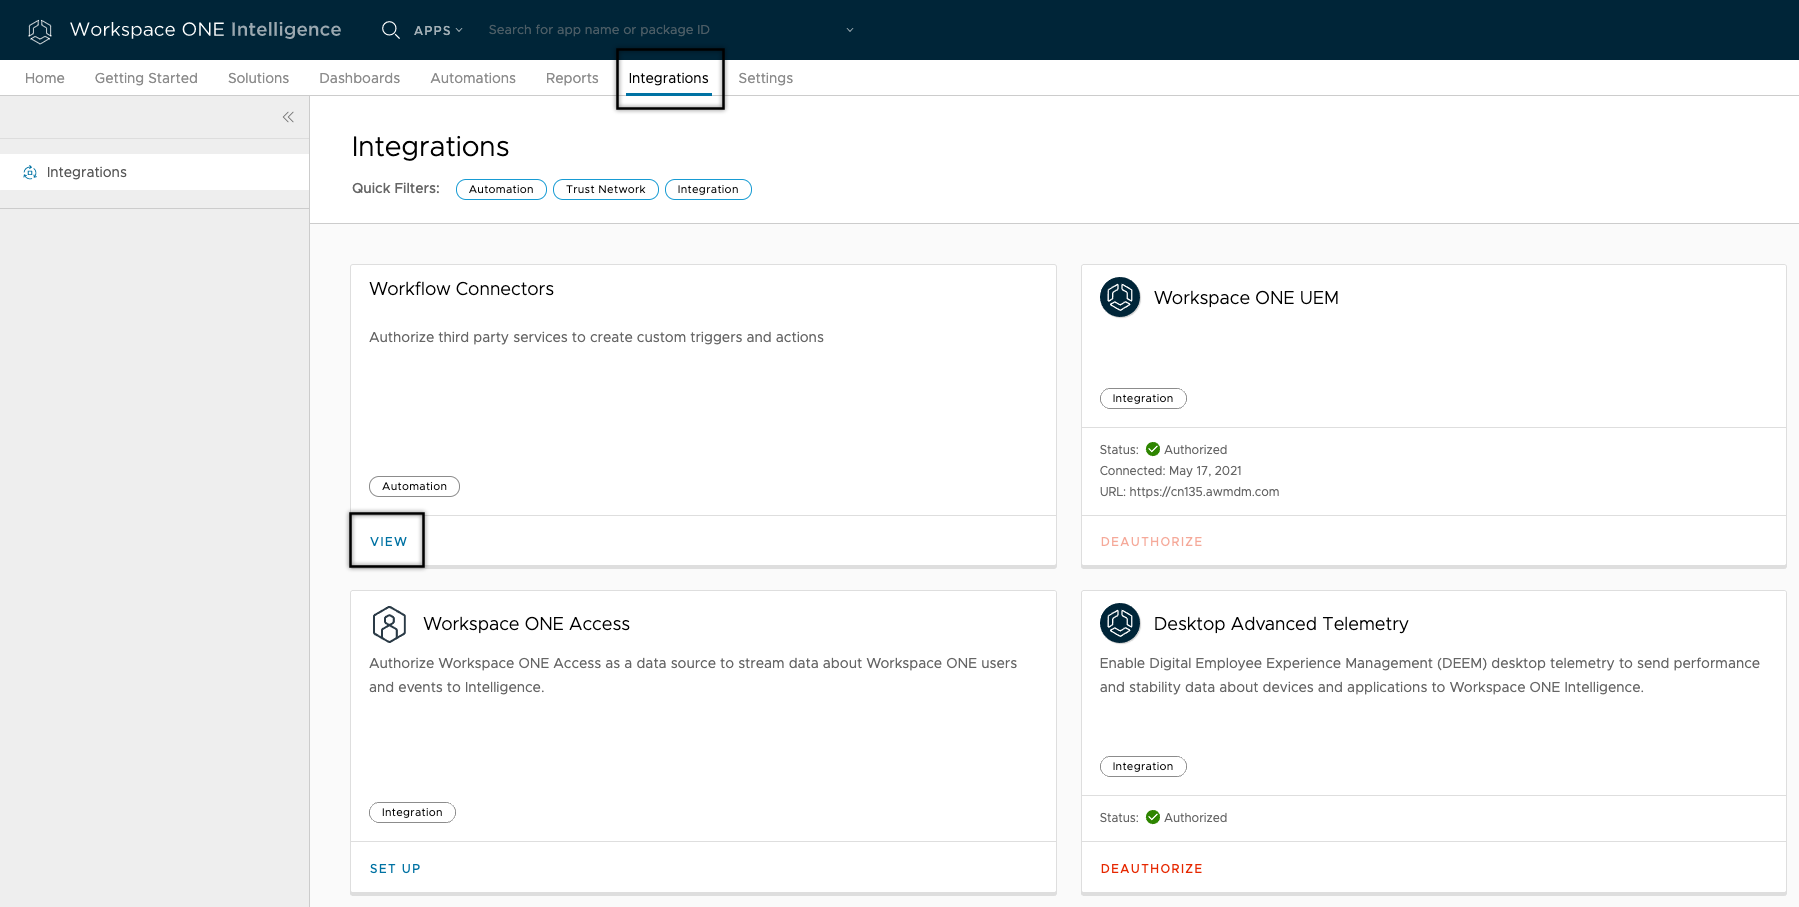
While WS1 Intelligence comes with a bunch of in-built connectors, the power of Intelligence Automation is unlocked when you start exploring its ability to provide Custom Connectors and thereby allowing you to integrate with almost any system that provides a RESTful API for Integration.
Creating Custom Connectors
NOTE: In this blog post, I’m taking a new approach where I’m going to be mostly explain through screenshots (click on the image for a close look and browse through the images).
Let’s look at the steps to create a Custom Connector.
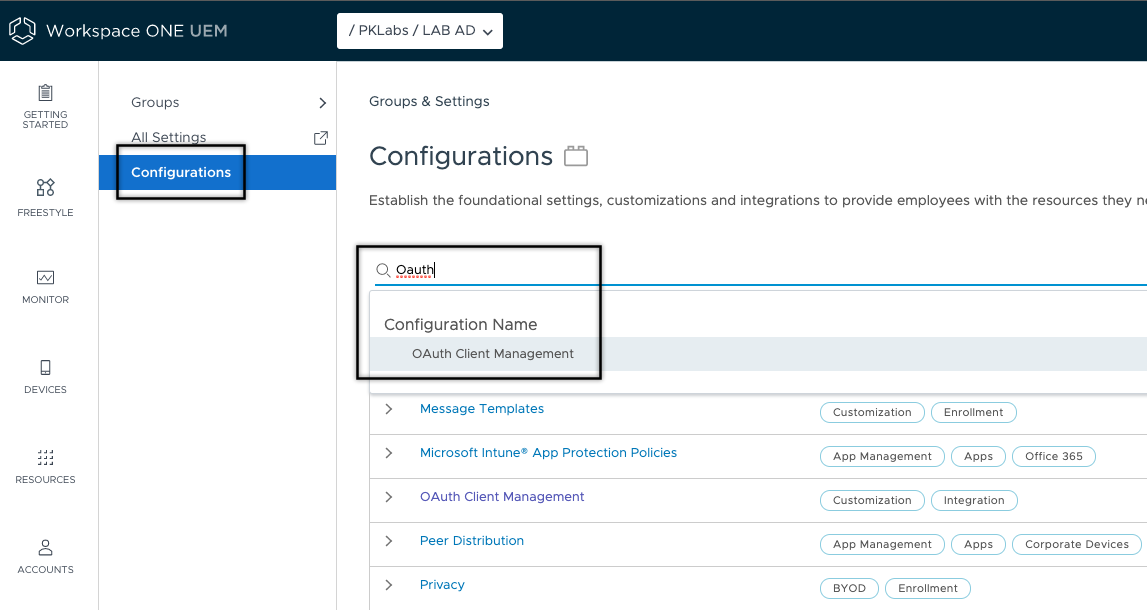
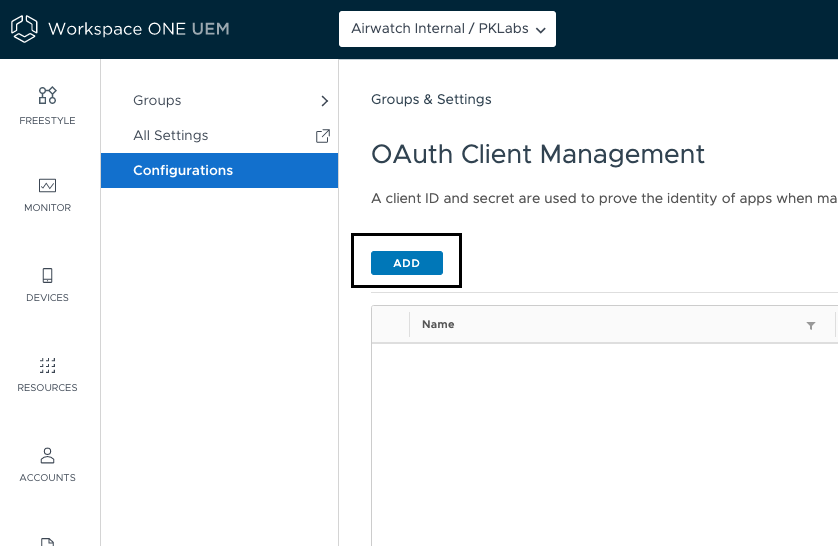
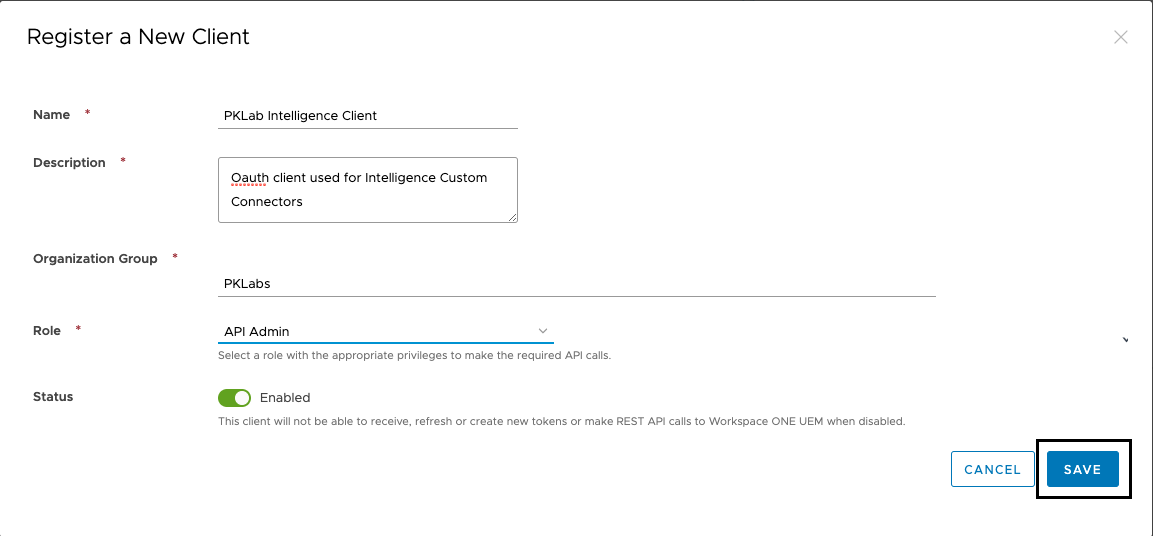
Pre-requisites: Setup Target System for API Access
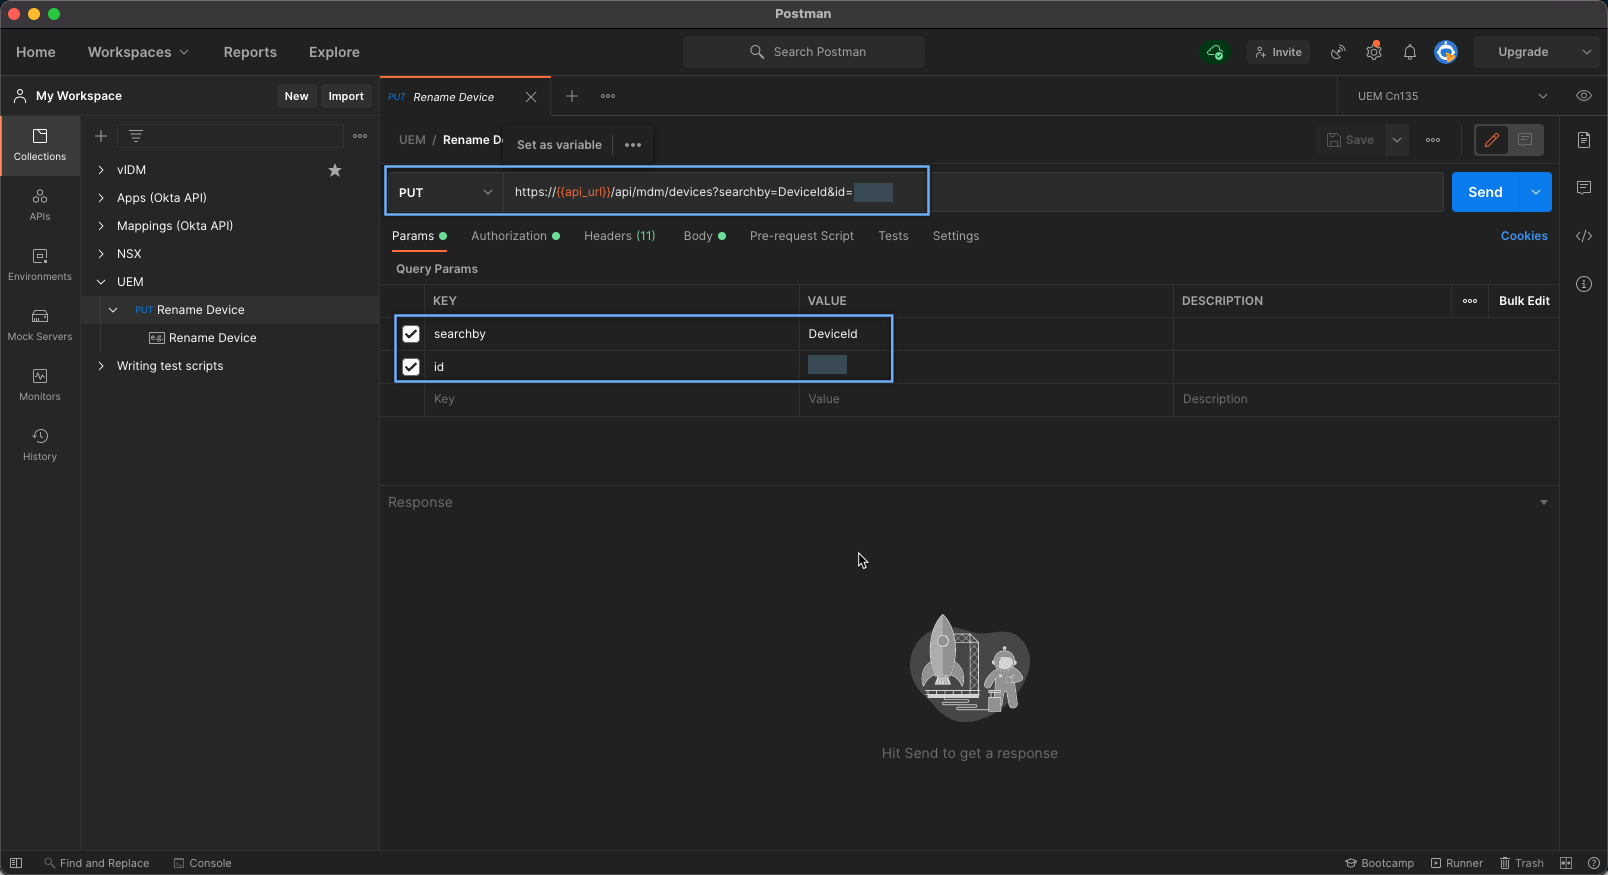
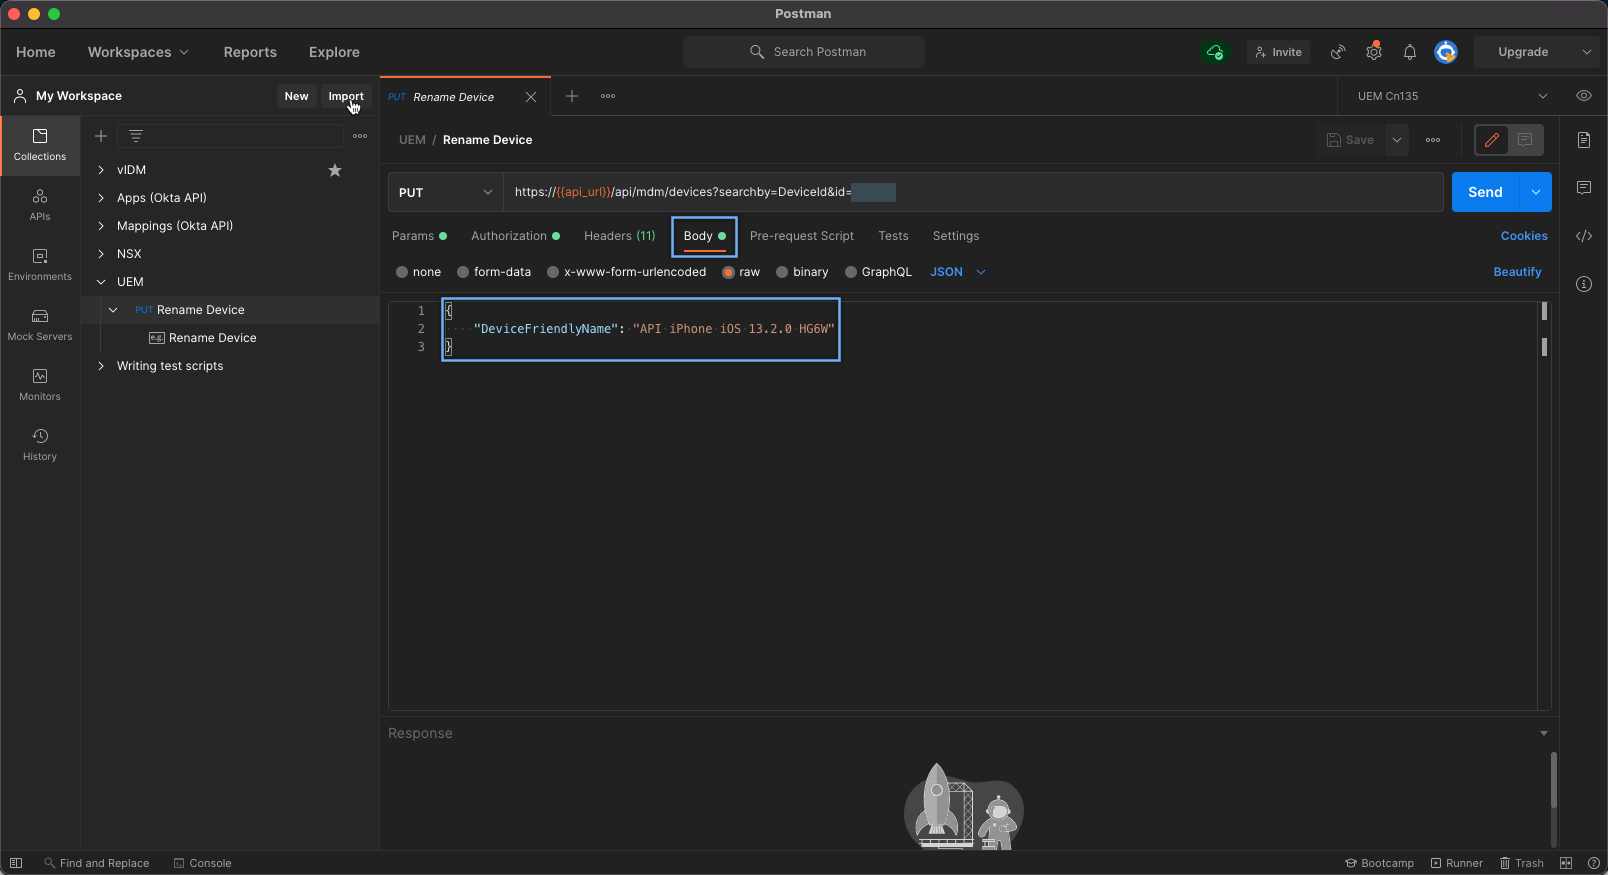
For this example, we are going to be using UEM APIs to rename a device - not quite the ground breaking integration but my goal here is to help provide a walk through of creating a Custom Connector so you are able to do it easily yourself!
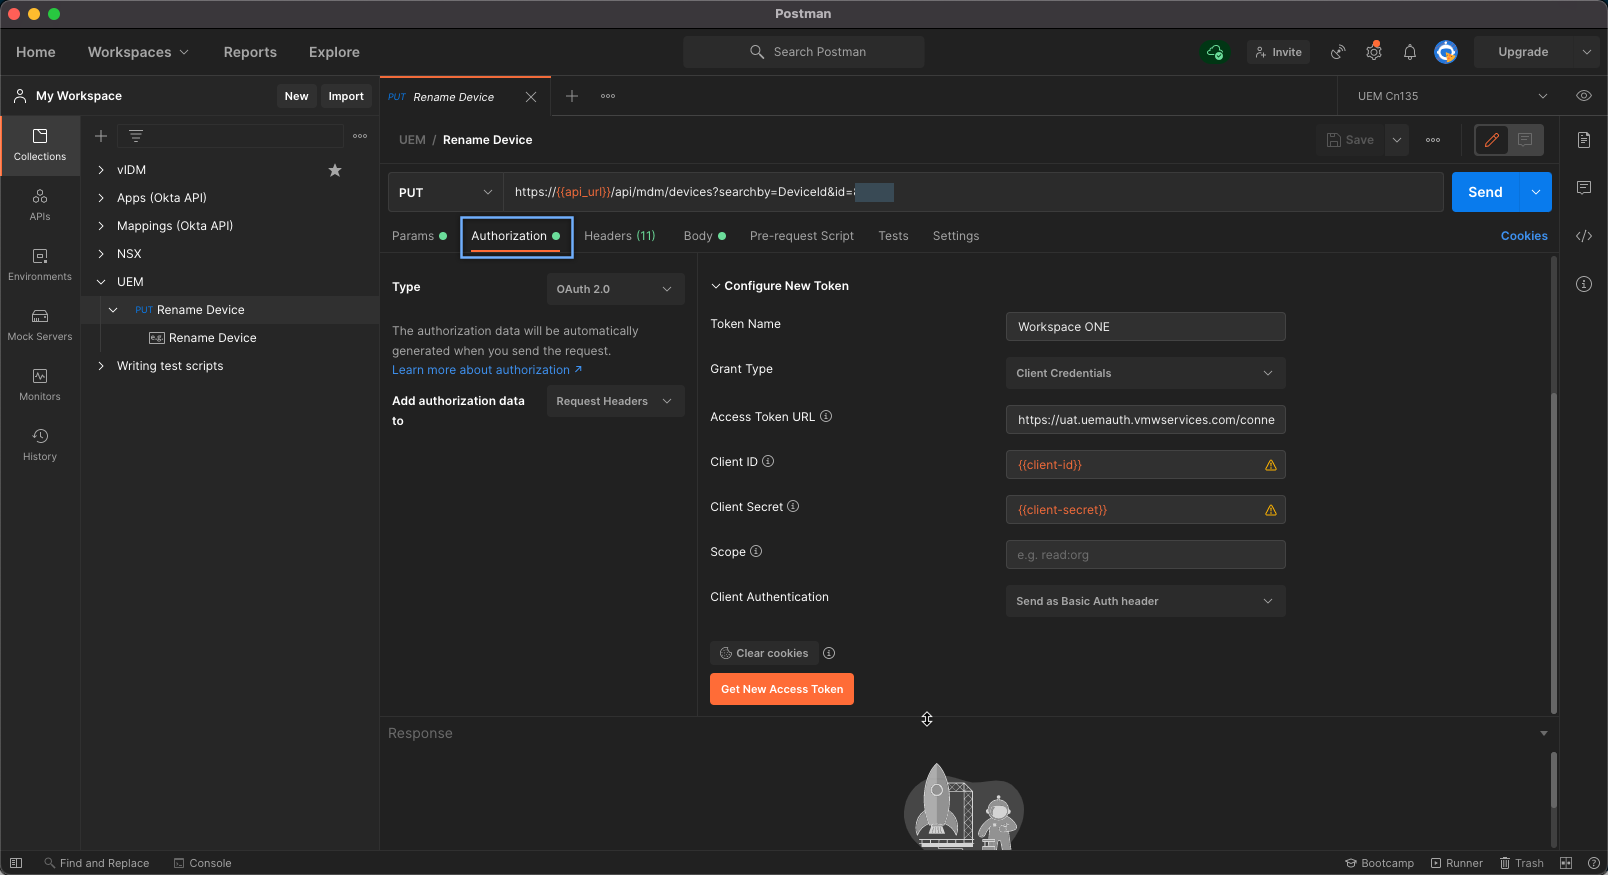
In order to set up UEM for integration, we are going to be creating a new OAUTH 2.0 client (alternatively, you can also use the usual method of making API calls using the aw-tenant-code).
Follow the steps as shown in the screenshots below.

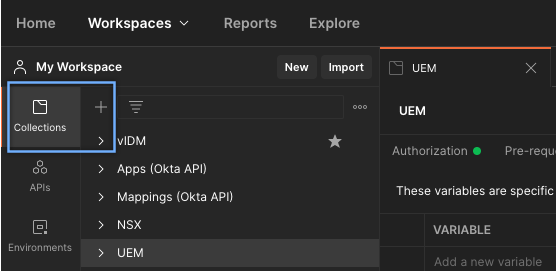
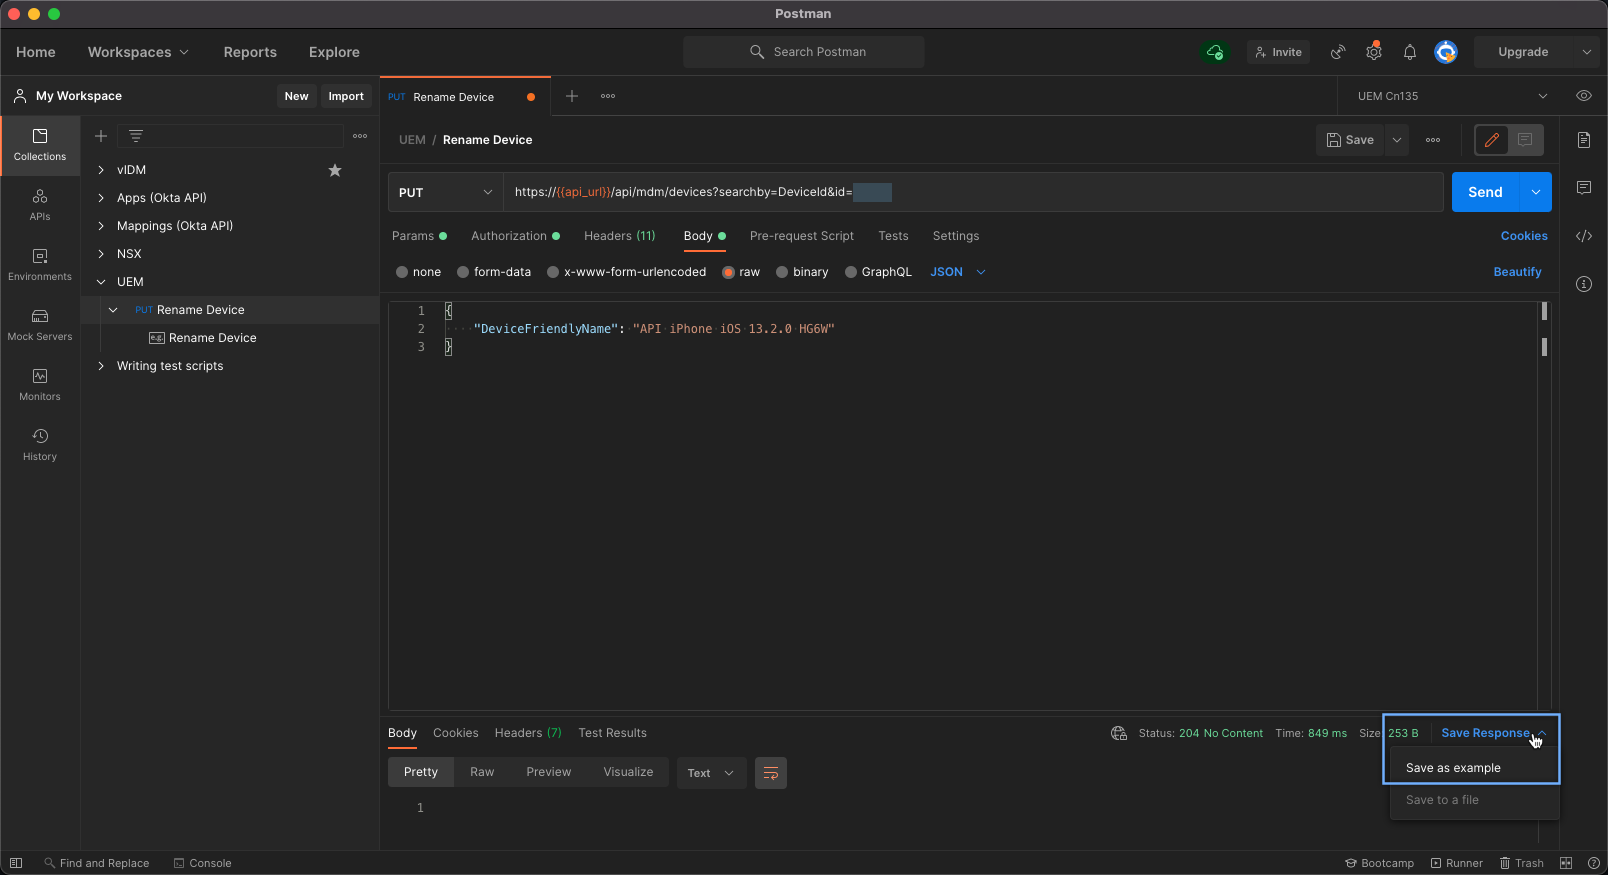
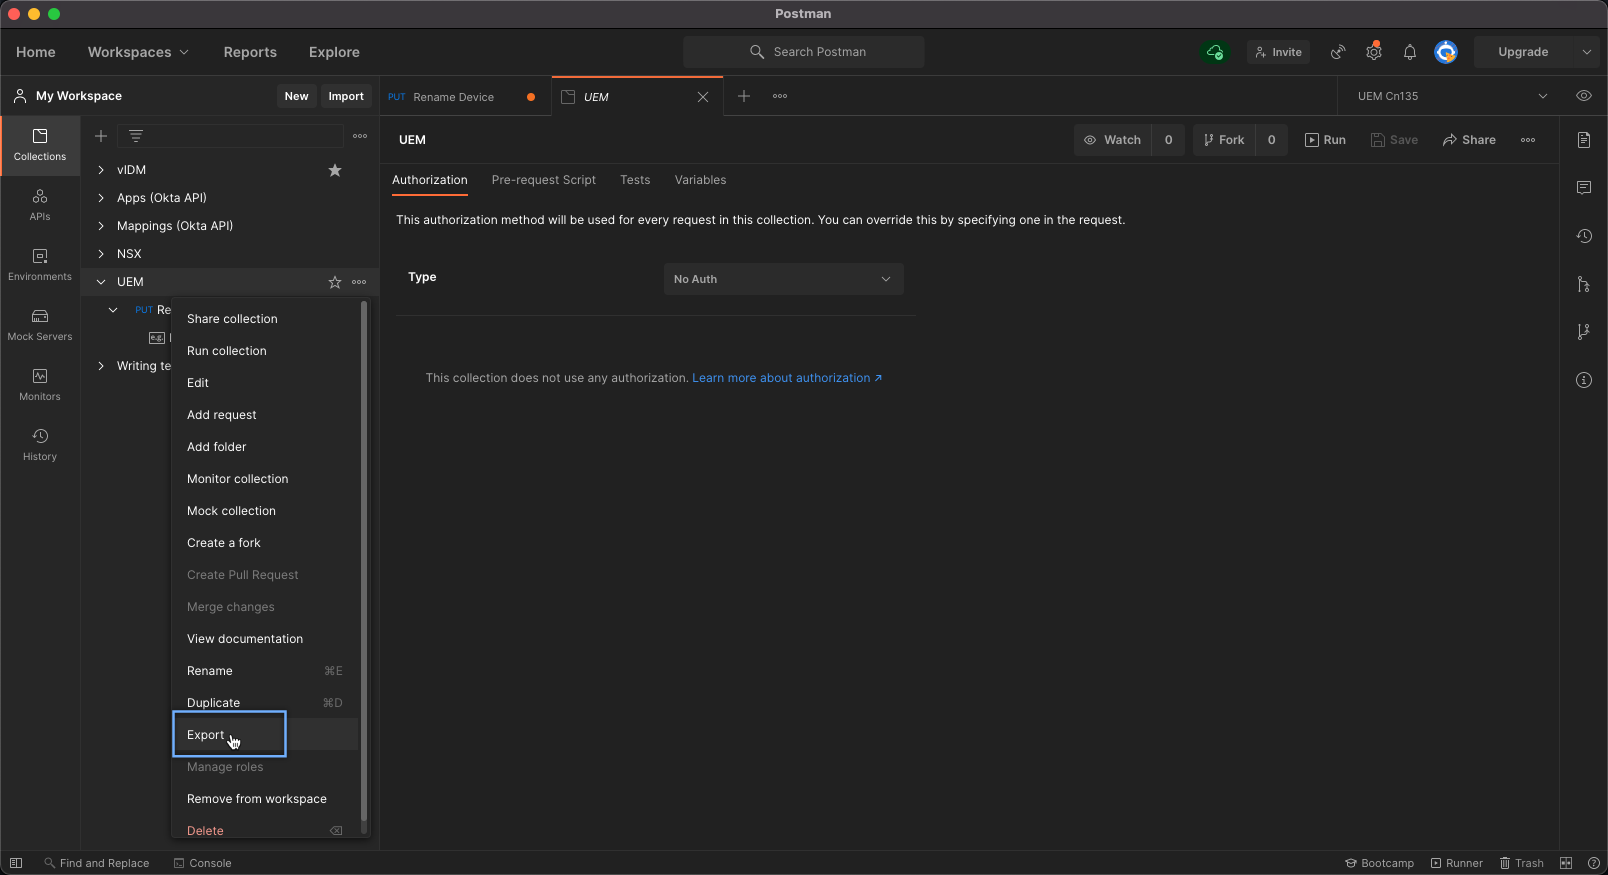
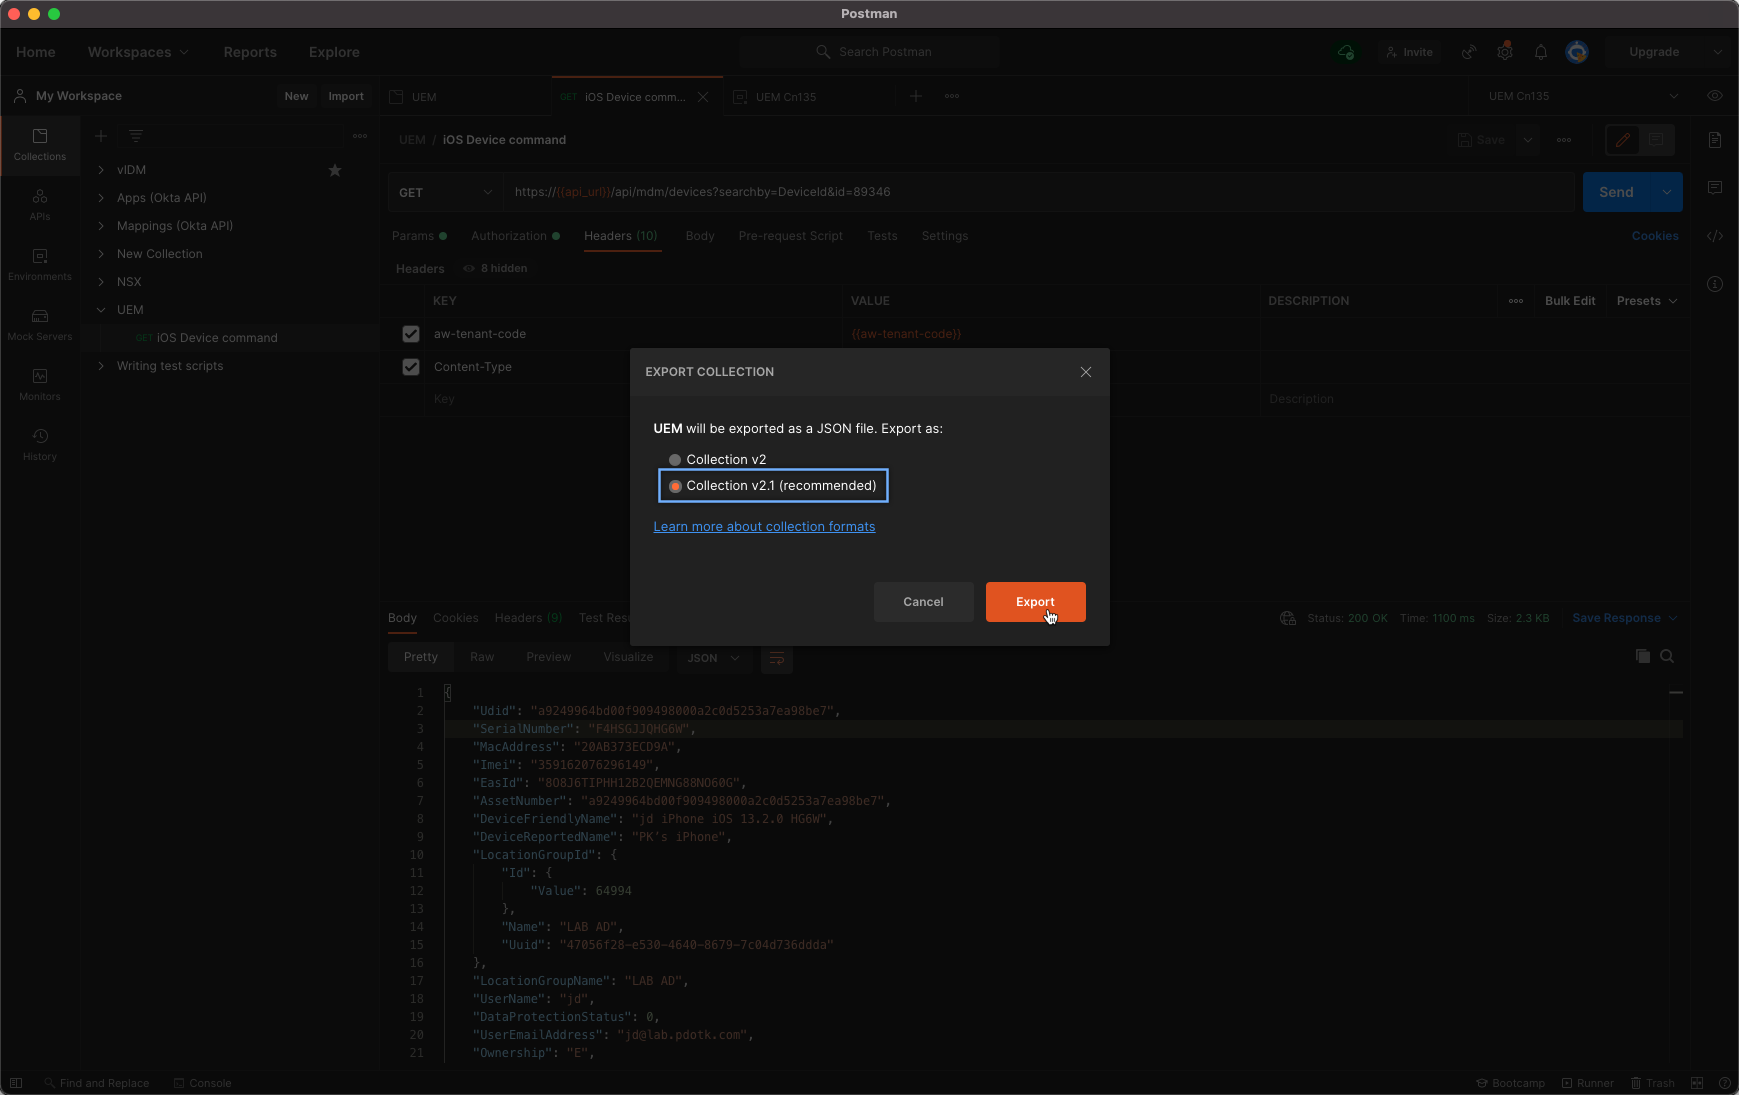
Step 1: Postman Collection
Once you have your target system setup for API access, you want to setup the API in Postman. This serves two purposes as it not only ensures that your API setup works with a standard and well-known API client but also will be used by Intelligence as Custom Connectors require a Postman Collection to be imported
Follow the steps as shown in the screenshots below.


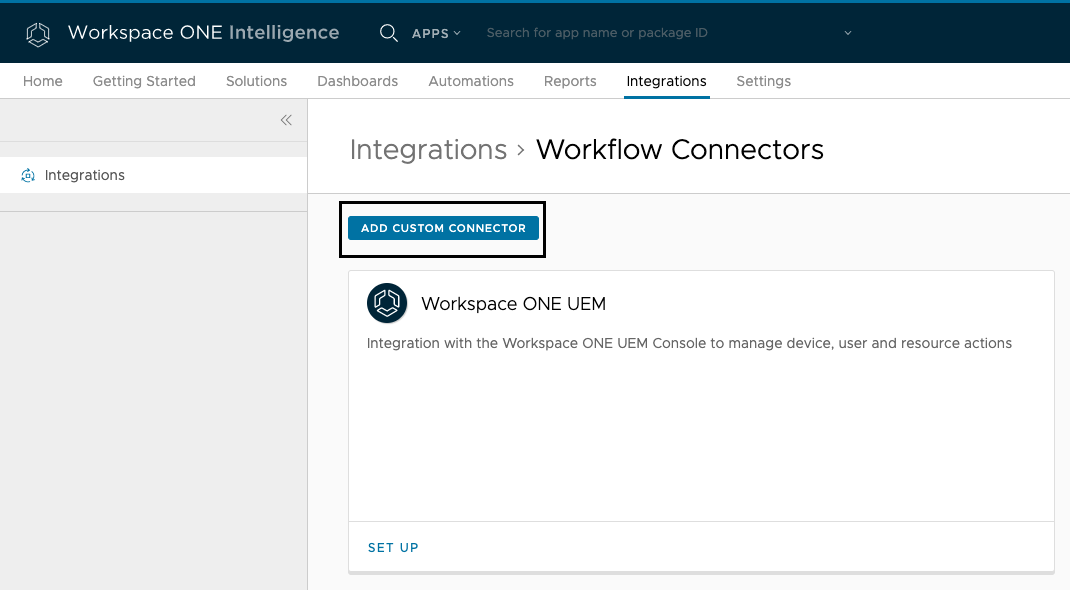
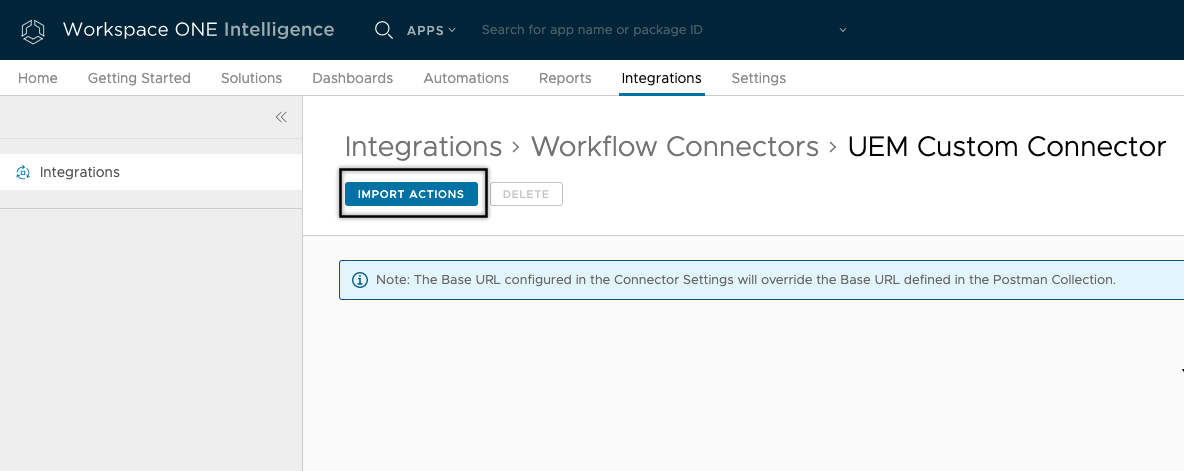
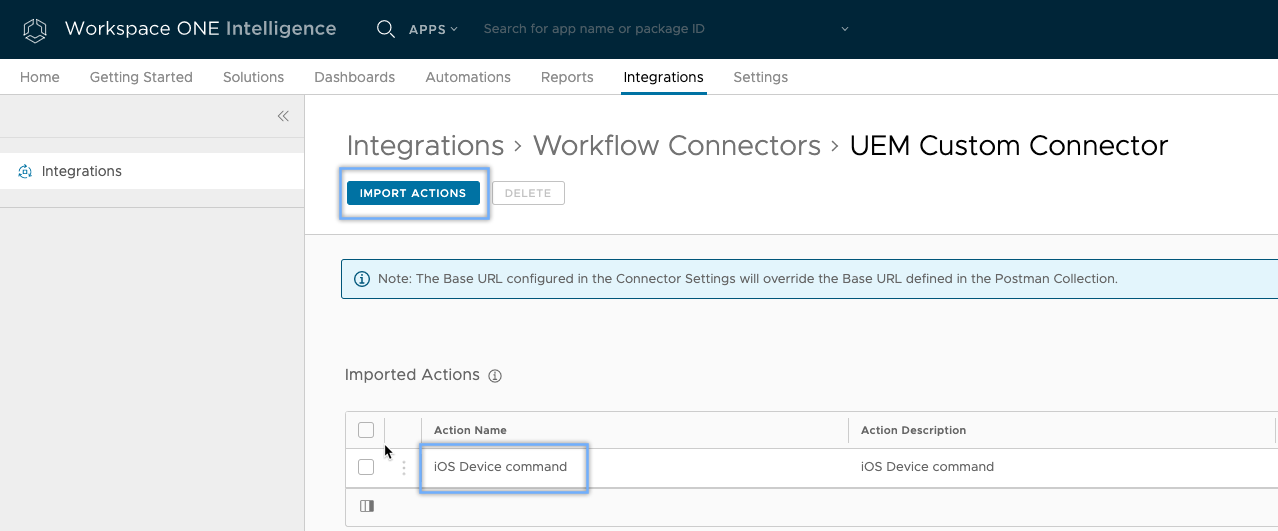
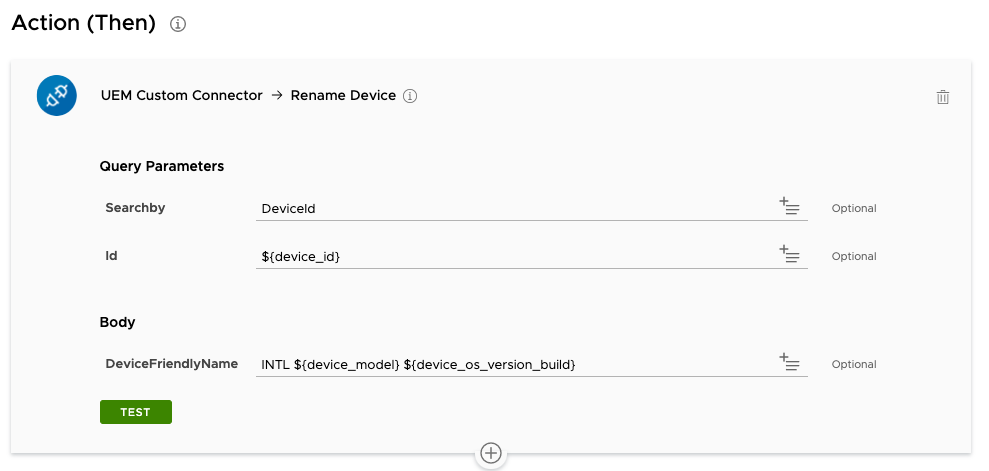
Step 2: Create the Custom Connector
Once you’ve completed your testing with Postman and verified functionality, it’s time to create your Custom Connector in Intelligence. The attributes required should be familiar to how you have your Postman request setup.
After you have the Custom Connector to your target system, you can start importing your API requests from the Postman Collection. These will be imported as Actions into Intelligence which can then use in your Workflows
Follow the steps as shown in the screenshots below.

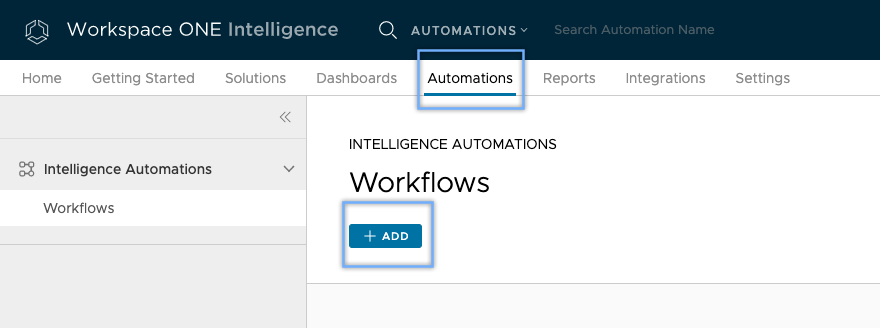
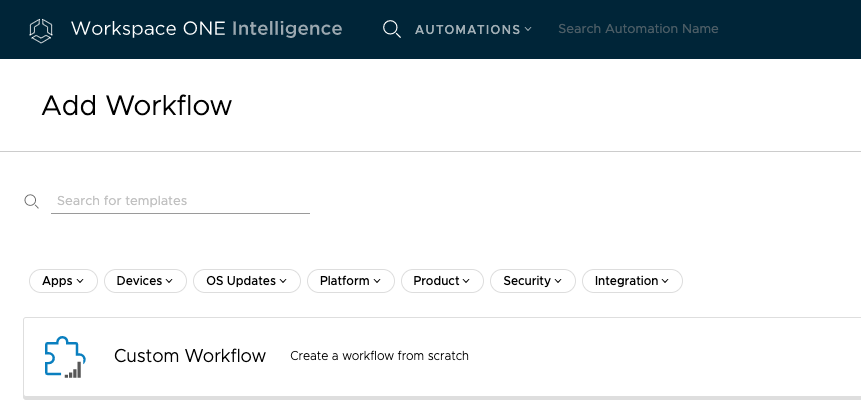
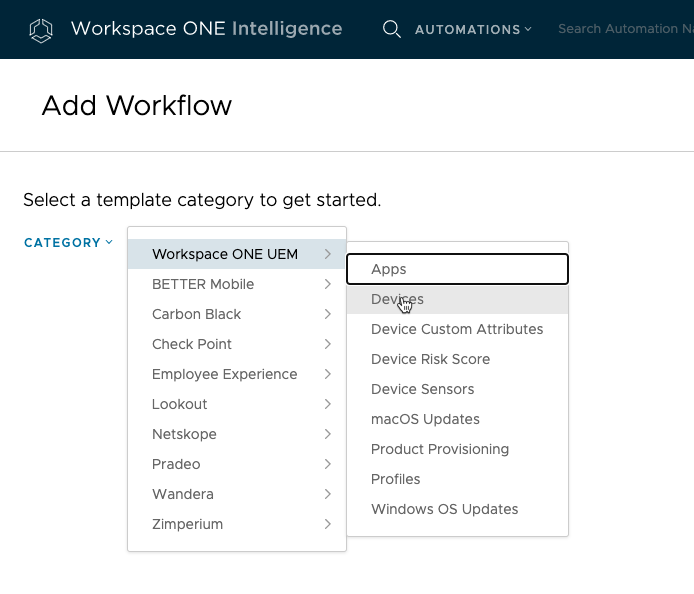
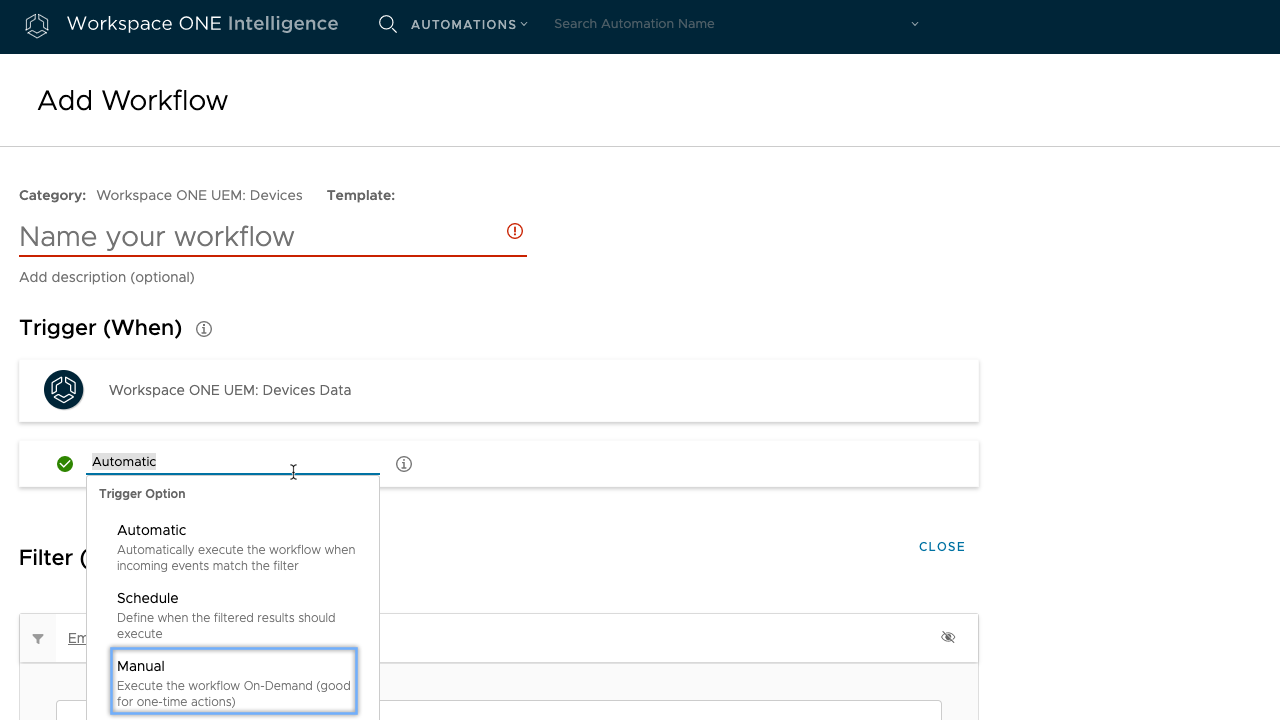
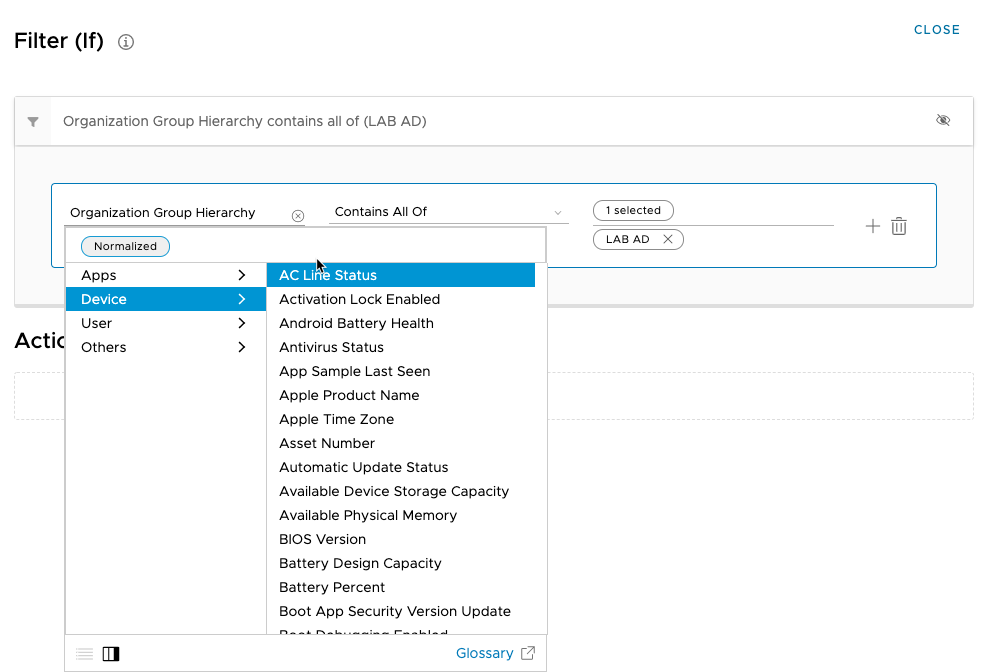
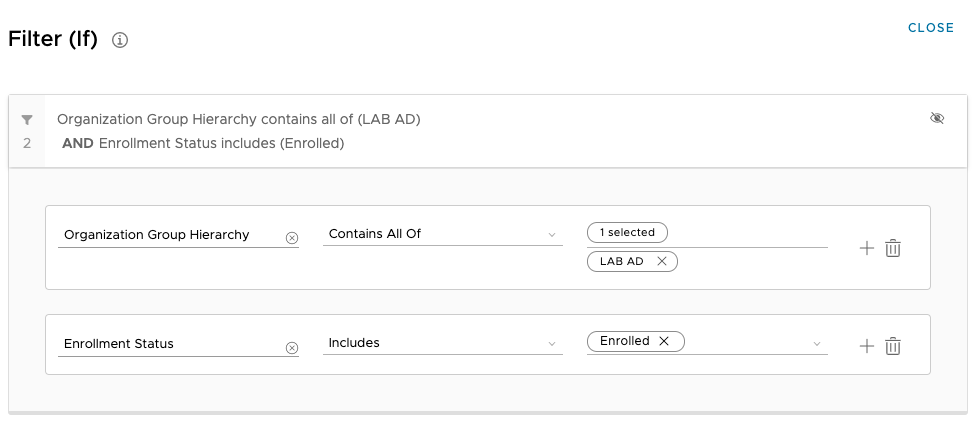
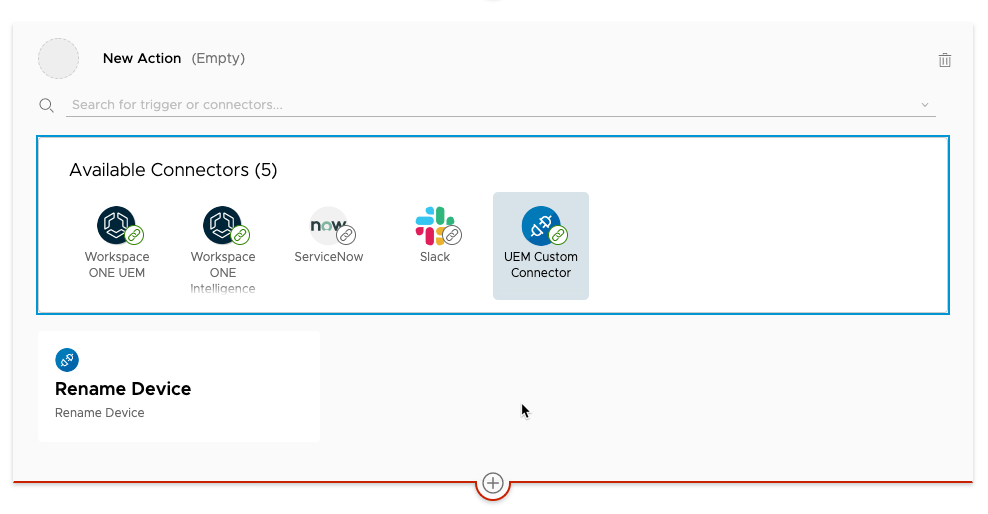
Step 3: Create the workflow
Workflows help define the logic that will make the integration magic happen. You’ll start by deciding when to trigger the workflow. Make sure to set it to manual when you are testing your workflows and then change to alternate methods. You’ll then proceed to setup your workflow by choosing your filters to target a section of the data and then choose the Action that you want to be performed.
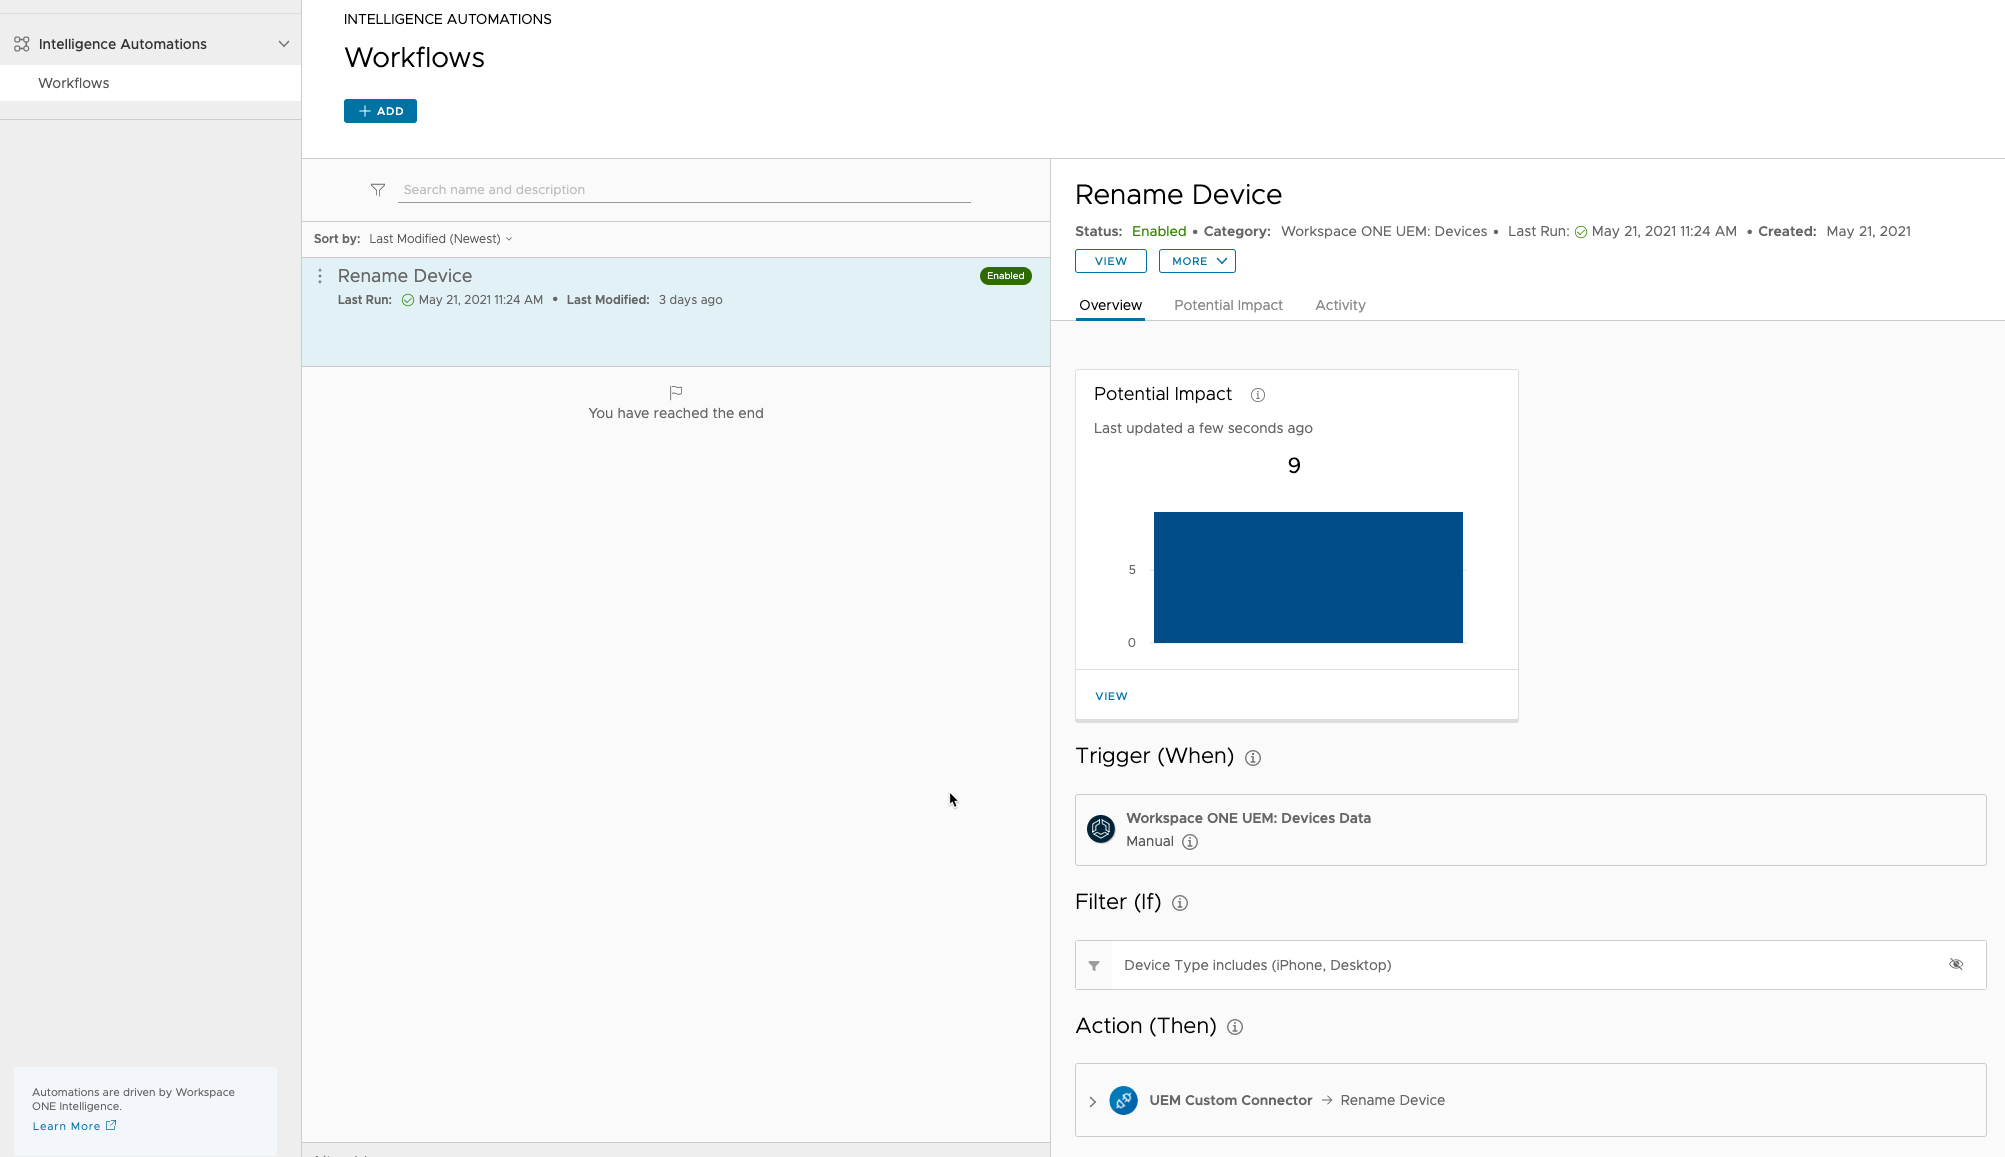
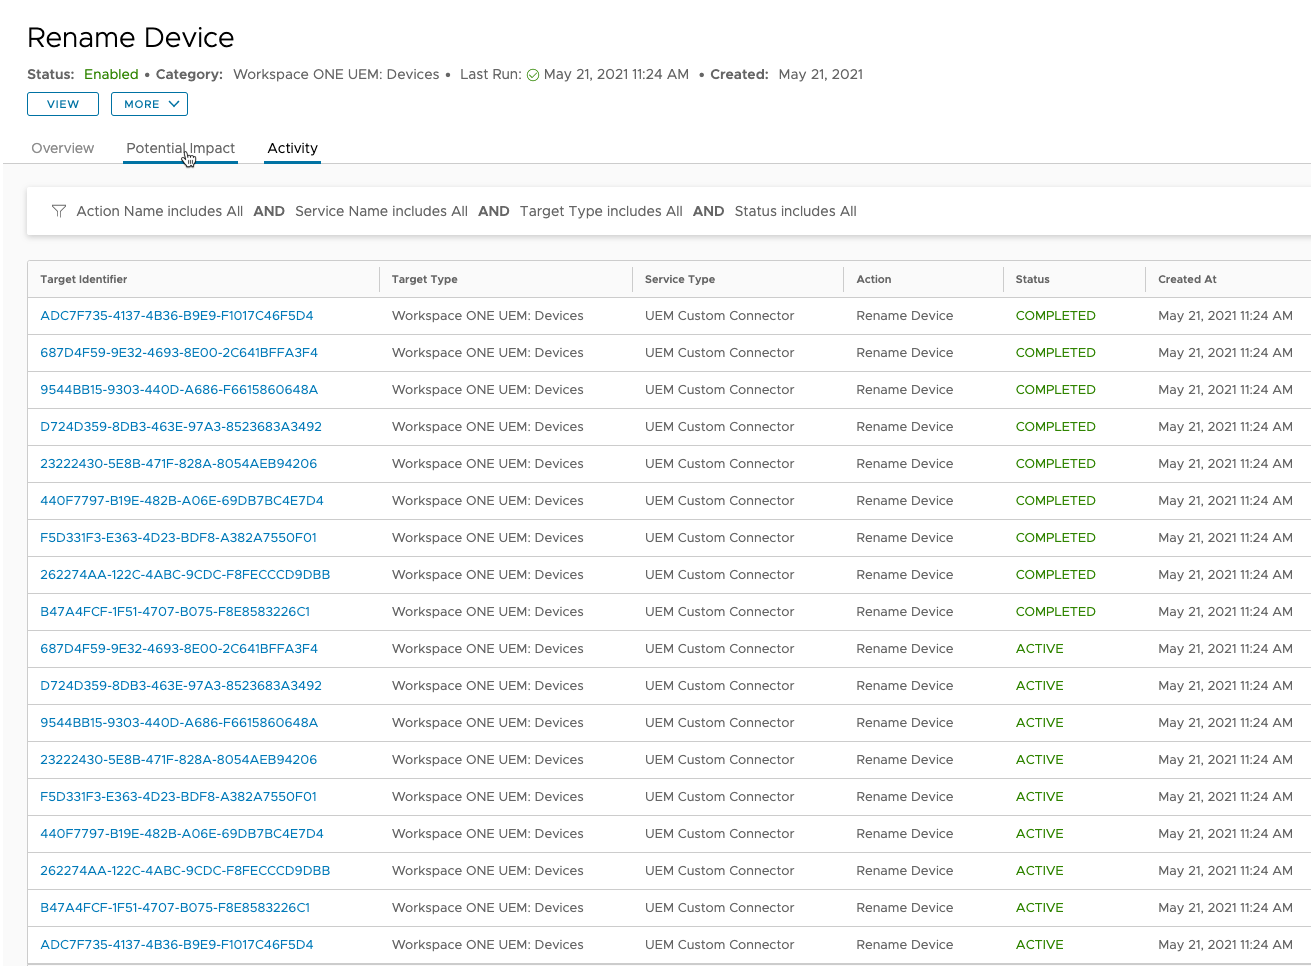
Step 4: Troubleshooting
Now that you have your workflow setup, there are a number of ways to know what your automation is doing from the Workflow UI.

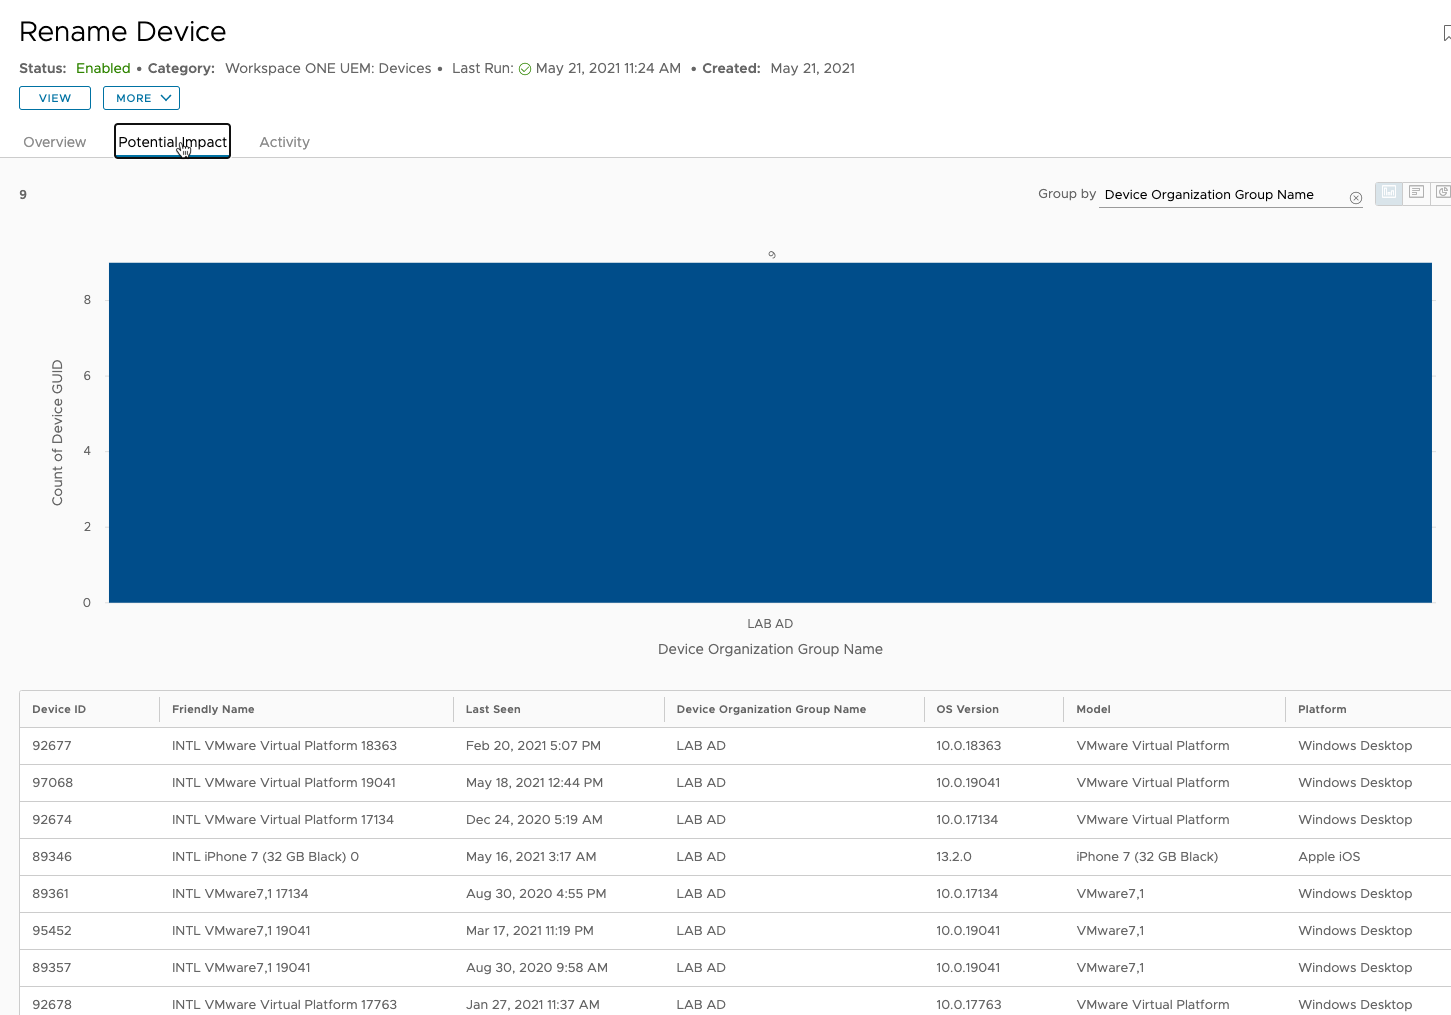
For additional details, you can choose to add a Dashboard and choose from the Intelligence category to see the Automation Run History data.

I hope this helps you when it comes to setting up Custom Connectors for your Automation use cases. Please let me know if you have any questions or feedback on this post.
Happy Automating!